
Adding DVR Servers
One ChannelWatch instance can monitor several Channels DVR servers. Use First-Run Configuration for the first connection, then use Settings > General > DVR Servers for further entries.
Multi-DVR server management was introduced in v0.9.0. Update an older installation before following these steps.
Adding a server
Section titled “Adding a server”- Open Settings > General.
- Find DVR & App > DVR Servers.
- Choose + Add Server for an empty row, or choose Discover and Add beside a discovered result.
- Fill in Name, Host, and Port. The usual port is
8089. - Choose Save Settings at the bottom of Settings.
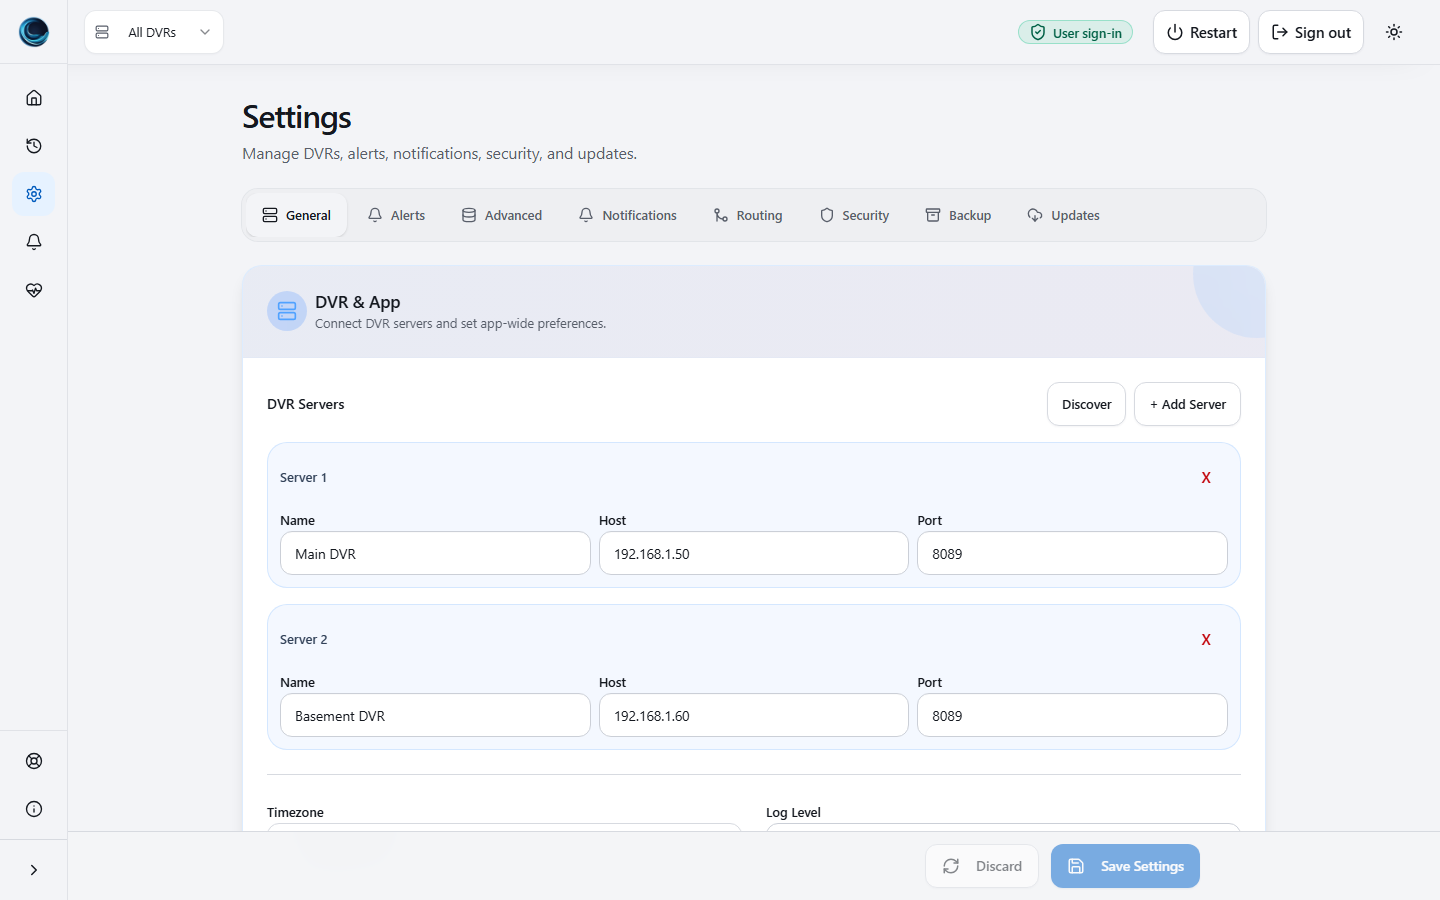
The name can be blank; ChannelWatch falls back to the host. Distinct names make activity and alerts easier to recognize when you have more than one DVR.
Saving writes the configuration, reloads settings, and requests a monitoring-core restart. The browser then returns to the dashboard. It does not pull a new image or recreate your container. After reconnecting, check the DVR’s dashboard status and Per-DVR Health. The General form does not run a separate connection test before saving. For diagnostic buttons, read the v1.6.5 test limitation and CLI fallback.
Per-DVR API keys
Section titled “Per-DVR API keys”The first-run manual form includes API Key (optional) and a connection test. The v1.6.5 General form only exposes Name, Host, and Port; it does not include an API-key editor.
If an additional DVR requires API authentication, see DVR API Keys for credential handling and the authenticated settings API. Back up /config before advanced configuration changes. Saved DVR API keys are encrypted using /config/encryption.key and masked when settings are read through the API.
Editing a server
Section titled “Editing a server”Edit the fields directly in Settings > General > DVR Servers, then choose Save Settings.
Renaming a DVR keeps its identity. An entry’s ID is derived from its host and port when it is created, while saved entries can retain an existing ID when edited. Check Settings > Routing after changing an address or replacing an entry: a newly added identity does not inherit routing or history from a removed one.
Use stable addresses or hostnames so a DVR remains reachable after reboots. See DVR Connection for bridge networking, DNS, and firewall checks.
Removing a server
Section titled “Removing a server”Choose the X beside the server row, then Save Settings. Until you save, the change is only in the form. Back up the settings before removing a connection you may need again.
For advanced automation, the backend also has separate soft-delete, restore, and hard-delete endpoints. Those have different data-retention effects; consult the API Reference before using them.
Pausing alerts without removing the DVR
Section titled “Pausing alerts without removing the DVR”To keep monitoring while silencing notifications, use Settings > Alerts for the DVR’s alert overrides or uncheck its destinations in Settings > Routing. Save the settings afterward.
The saved server model also supports an enabled value for advanced API or file configuration, but v1.6.5 does not expose an Enabled switch in the General form. See Environment Bootstrap Config if you manage settings directly.
When a DVR goes offline
Section titled “When a DVR goes offline”ChannelWatch retries the connection automatically. Review the dashboard’s per-DVR status and freshness indicators rather than assuming that a saved address is healthy. Other DVRs have their own connections and continue monitoring independently.
Check DVR Health Alerts for outage and recovery notifications, or Common Issues if the connection does not recover.
Next steps
Section titled “Next steps”- mDNS Auto-Discovery — find DVRs on your LAN.
- Per-DVR Notification Routing — choose destinations for each DVR and event type.
- Multi-DVR Overview — understand identity, shared settings, and scale limits.